Wednesday, October 26, 2011

Happy Hollydays!

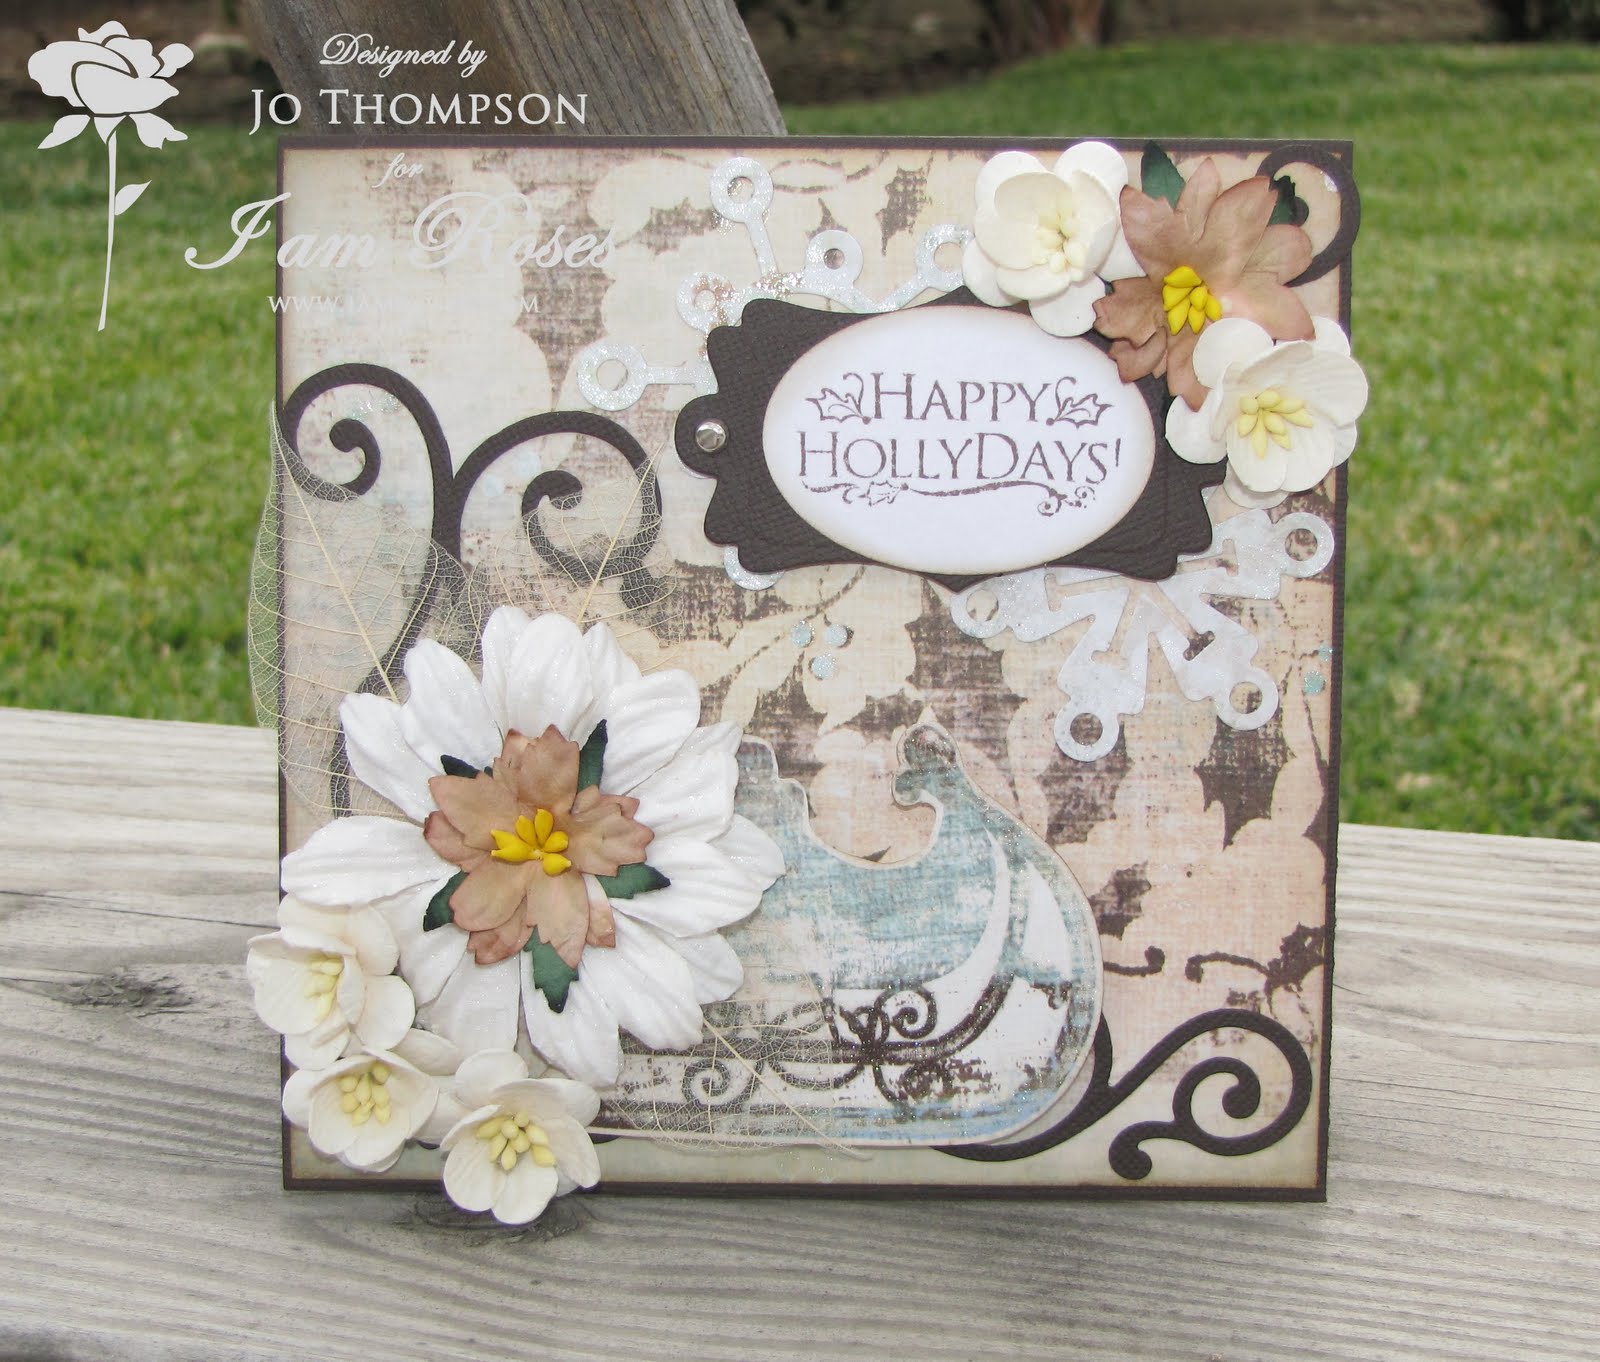
Happy Wednesday! I created an I Am Roses Christmas card today for you guys. I'm using more of the MME Festive & Frost paper stack that I purchased last year. I am determined to use up this 12x12 paper pad this year, no more hoarding! LOL. The stamp set I used is from Inkadinkadoo Holiday Filigree. To punch out the sentiment I used the large oval punch from Stampin' Up!. Using the Grommet Tags from Spellbinders, I cut some brown cardstock and layered the sentiment over that and added some silver brads. All the papers were edged with Walnut Stain Distress Ink.

Out of some of the pattern paper I used my Quickutz Snowflakes die and placed them in the background. The White Puffy Daisies and the snowflakes were sprayed with my Lindy's Stamp Gang Glitz Spritz in Scintillating Silver. I used these Small Brown Poinsettias for the card to match the brown tones in the pattern paper. To make the card more lush, I added some White Cherry Blossoms.

On the corner of the card I cut out this sled from the pattern paper. I then layered some of the Natural Skeleton Leaves for the flowers to lay on. So there is my card and I hope you guys enjoy the rest of your day. Thanks for stopping by!

I Am Roses Products (links provided):
S3-152 White Cherry Blossoms
K1-805/Z Small Natural Skeleton Leaves
C4 Sm. Brown Poinsettia
PS-15 White Puffy Daisies (Sold Out)
Other Products:
Brown Cardstock, Inkadinkadoo Holiday Filigree, MME Festive & Frost 12x12 Paper Pad, Rich Cocoa Memento Ink, QK Snowflakes (REV-0069), QK Flourishes (REV-0024), Cuttlebug, Lindy's Stamp Gang Glitz Spritz Scintillating Silver, Spellbinder's Grommet Tags, SU! Oval Punch, Silver Brads, Walnut Stain Distress Ink

Friday, October 21, 2011

Dress Form Fairy

I finally finished my dress form project, here it is! I love fairies and dress forms, so why not combine both and I did. This was a paper mache dress form that I had purchased from my local scrapbook store. All the beautiful floral embellishments I used are from I Am Roses. To start off, I painted the entire dress form with a pink acrylic paint. After that I coated it with a crackle medium. I let that dry then I used white acrylic paint as the top coat. I love the end results.

I covered the the middle part of the dress form with Gardenia Curly Petals to mimic the skirt. I added some mini rhinestones and pearls randomly on the petals. I placed some lace trim and Natural Skeleton Leaves on the bust. To add more interest to the neckline, I added some mini pearl flat back pearl trim and a rhinestone button.

On the base of the dress form, I wrapped a White Paper Flowers Spray and randomly placed some Pink Paper Roses, Pink 2 Tone Semi Open Rose Buds, White Paper Roses and more Skeleton Leaves.

My favorite part is the wings. I used more of the skeleton leaves to form the wings, three on each side. They look very delicate and whimsical. I tied some lace trim into a bow and used this beautiful large crystal flower from KARLAS001 Etsy.

To add a little more detail, I place some mini flat back pearl trim down the lace to mimic buttons. So there is my Fairy Dress Form for you guys this Friday. I hope you have enjoyed it as much as I did making it. For a more detailed look, you can view my video here. Have a great weekend everyone!

I Am Roses Products (links provided):
GP2-1 Small Gardenia Curly Petals
R4-1 1/2" Mixed Pink Paper Roses
R8-15 1/2" White Paper Roses
K1-805/Z Small Natural Skeleton Leaves
SP2-151 White Paper Flowers Spray
T30-518 Pale Pink 2 Tone Semi Open Rose Buds
Other Products:
Paper Mache Dress Form, Mini Rhinestones/Pearls, Crackle Medium, Pink/White Paint, Misc White Paper Leaves, KARLAS001 Etsy Large ButterflyKisses Crystal Flower, KARLAS001 Etsy Mini Flat Back White Pearl Trim, Misc Bling Button, Lace Trim, Hot Glue Gun

Thursday, October 20, 2011

Bon Voyage

If you don't know about it already but Stamper's Dream is having their closing out sale. You can read all about it here and also there's a coupon code you don't want to miss out on. I used the JustRite Bon Voyage stamp set in my card for today. I layered several of the images on dimensional foam pop dots. I used my Spellbinders Labels Four dies to cut the pattern paper (Prima Printery). There are coordinating dies that do go with this stamp set, unfortunately I don't have them but I think it turned out fine with the ones I chose to use. I added some rhinestones for that extra sparkle.

The "Bon Voyage" sentiment is also from the same stamp set. I cut my own little banner and inserted it behind one of the images. All the papers were either distressed with Black Soot or Antique Linen Distress Ink.

The stamp set also came with an Eiffel Tower image. I stamped it in the inside of the card and added a few strips of the Prima Printery paper also. So here is another card for this week. Don't forget to check out Stamper's Dream to get some great deals. Thanks for stopping by, have a great evening!


Stamper's Dream Products (links provided):
JustRite - Bon Voyage Cling Mounted Stamp Set
Memento Tuxedo Black Ink
Other Products:
Prima Printery, Black Cardstock, Antique Linen & Black Soot Distress Ink, Spellbinders Labels Four, Various Rhinestones, Dimensional Foam Pop Dots, Glossy Accents, Cuttlebug


Happy Thursday! I just wanted to quickly share this Copic video that I recorded using my Logitech C910 webcam. My first time using my webcam to make videos, still needs tweaking but I love the quality and clarity of the video. The colors I used are listed in the description box in the video. Thanks for watching, enjoy!

Wednesday, October 19, 2011

Birthday Card Share

Happy Wednesday! I wanted to share this birthday card I created this afternoon. I love The Greeting Farm stamps and I wanted to try something different. Instead of using Copic paper to stamp the image on, I went with kraft cardstock. I really love the vintage feel it gave my image. I then colored the image with my Copic markers (colors listed below). The colors look much softer.
I distressed all the paper edges with Walnut Stain. The image is popped up on dimensional foam pop dots. On the bottom I added pattern paper punched with a scallop border punch. I then layered some trim and buttons from my stash. I used a cupcake border punch on some more of the MME pattern paper.

Here is a video I made showing how I colored the image onto kraft paper. I also show a similar card with a different trim.


Enjoy the rest of your day and thanks for stoppng by!

Supplies used:
MME Life Stories 12x12 Paper Pad
Kraft Cardstock
Ivory Cardstock
The Greeting Farm - Birthday Anya II
Memento Rich Cocoa Ink
Distress Ink Walnut Stain
Ruffled Trim
Misc Buttons
Ivory Burlap String
Sakura White Gel Pen
Dimensional Foam Pop Dots
EK Success Cupcake Border Punch
Fiskars Treading Water Scallop Punch
Copic Markers (0, E31, E93, C3, Y13, RV11,R27)

Tuesday, October 18, 2011

"Believe" - A Stamper's Dream Farewell Blog Hop

Good morning everyone! Welcome to your final stop for the Stamper's Dream & Friends Blog Hop!

Here is my project for today. I made this card using the JustRite Christmas Trimmings stamp set. I love all the options you are given to decorate your Christmas cards. I decided to use the wreath stamp and the sentiment "Believe". The wreath was colored with my Copic markers. I used Tsukineko's Rich Cocoa to stamp the images. The paper collection I used was from my stash, MME Festive & Frost. All the papers were edged with Walnut Stain Distress Ink.

The wreath image was popped up on dimensional foam dots. The die I used as the base was Spellbinders Fancy Tags Two. The little pieces that came off the die after it was cut was used as little accents above and below the wreath. Brown seam binding from my stash was my ribbon of choice. It made my card look like a Christmas present.

To finish the inside of the card, I just punched a strip of scrap paper with a scallop border punch. So there is my card for the hop. All the links to the products that are still available at Stamper's Dream will be posted below.

*Now here is a little message from Michelle of Stamper's Dream:


It is with a heavy heart that I announce I've decided to close Stamper's Dream ! After many tears, and much prayer I just know it's the right thing for me. I really feel the need to reclaim my life and spend more time with family and friends. My grandchildren are growing up so quickly! And let's face it...no one can do it all! Not forever, anyway.

Stamper's Dream is having a SALE!


So...my loss is your gain! Everything in the store is 20% off with the coupon code Farewell2U. Just enter on the checkout page in the coupon section and it will take 20% off the lowest marked price of the items in your shopping cart! There is a $20 minimum to activate the coupon. Sorry, but there will be no free shipping during the liquidation.

And did you know we're having our very last Stamper's Dream blog hop??? I invited some special friends to hop with us as well! Here's the lineup:

Michelle Rodgers
Becca Feeken
Tosha Leyendekker
Denise Marzec
Laurie Schmidlin
Carolyn King
Amy Sheffer
Arlene Cuevas
Teresa Kline
Jessica Diedrich
Mariana Grigsby
Lea Lawson
Jo Thompson (you are here, the final stop)

My undying thanks to members of The Dream Team both past and present! I have communicated with them privately...and they all know how much they mean to me. Always have. Always will!

Thanks so much for stopping by...

Michelle


I would just like to say thank you to Michelle for this fabulous opportunity to have worked with her and the amazing design team members. Thank you to all who have joined me through this Stamper's Dream adventure =) If for some reason you have just joined in on this fabulous hop, please visit the other design team members blogs for their fabulous projects.


Don't forget to take advantage of the awesome Sale/Discount mentioned above. Thank you and have a fantastic Tuesday!


Stamper's Dream Products (links provided):
JustRite - Christmas Trimmings Cling Mount Stamp Set
Memento Rich Cocoa Ink
Other Products:
MME Festive & Frost 12x12 Paper Pad, Ivory Cardstock, Spellbinders Fancy Tags Two, Copic Markers, Kraft Cardstock, Neenah Classic Crest Solar White Paper, Brown Seam Binding, Dimensional Foam Dots, 1 1/2" Circle Punch, Fiskars Treading Water Border Punch, Cuttlebug


Thursday, October 13, 2011

A Gift for You

Happy Heat Wave Wednesday! It is hot hot hot up in here =) I have a Christmas card for you today brought to you by Stamper's Dream. I have been very good and I used paper from my stash. Woohoo! I distressed the edges with Walnut Stain. I used the dies from Spellbinders 2011 Heirloom Ornaments. They are suppose to be Christmas ornaments but I decided to make a flower instead. I used a circle punched paper as a base and glued individual ornaments with the point sticking out. I then used one of the smaller dies for the center and did the same thing. I adhered them with hot glue. For the center of the "flower" I used a vintage button.
The sentiment "A Gift for You" is from JustRite Christmas Mini Sentiments. I embossed it with white embossing powder on vellum paper. I cut a little ribbon tail at the end and adhered a small pearl. I laid a large piece of crochet trim at the back and some pearl flourishes. So there is my card and I hope you look at your dies at a different way =) All the product links available at Stamper's Dream are listed below. Have a great evening!

Stamper's Dream Products (links provided):
Spellbinders - 2011 Heirloom Ornaments
Spellbinders - Classic Petal Edgeabilities
JustRite - Christmas Mini Sentiments Set
JustRite - Clear Mini Sentiment Stamper
Distress Ink - Walnut Stain
Other Products:
MME Festive & Frost 12x12 paper pad, Ivory Cardstock, Vintage Button, Crochet Trim, Pearl Flourish, Vellum, White embossing powder, Adhesive Pearls, 1 1/8" Circle punch, Hot Glue Gun, Cuttlebug